![]()
![]()
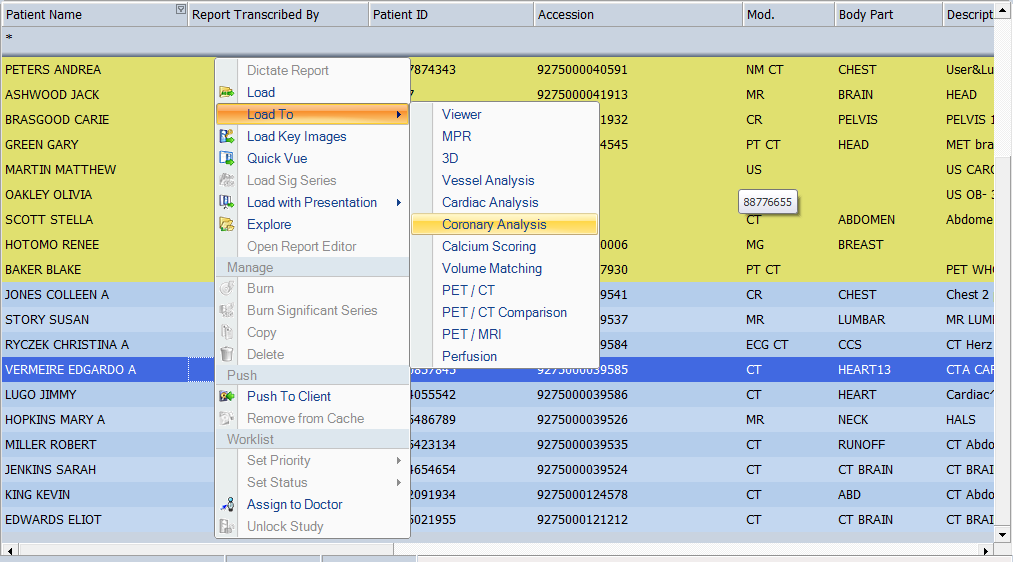
You can create a Coronary Analysis view manually. For information about automatically creating a Coronary Analysis view, go to Display Protocols.
|
To create a |
Do this: |
|
From the Archive Explorer |
Right-click a study group, select Load To, then select Coronary Analysis.
Or Right-click a study group and, provided that a Coronary Analysis Display Protocol has been pre-defined, select Load. NOTE: If several phases are selected, the application opens only one window with all the phases. |
|
In the PowerViewer |
Or
|
|
From the Patient Mini-Archive |
1. Right-click a study group, then drag it to the display area. 2. Select Coronary Analysis. |
|
To an open application |
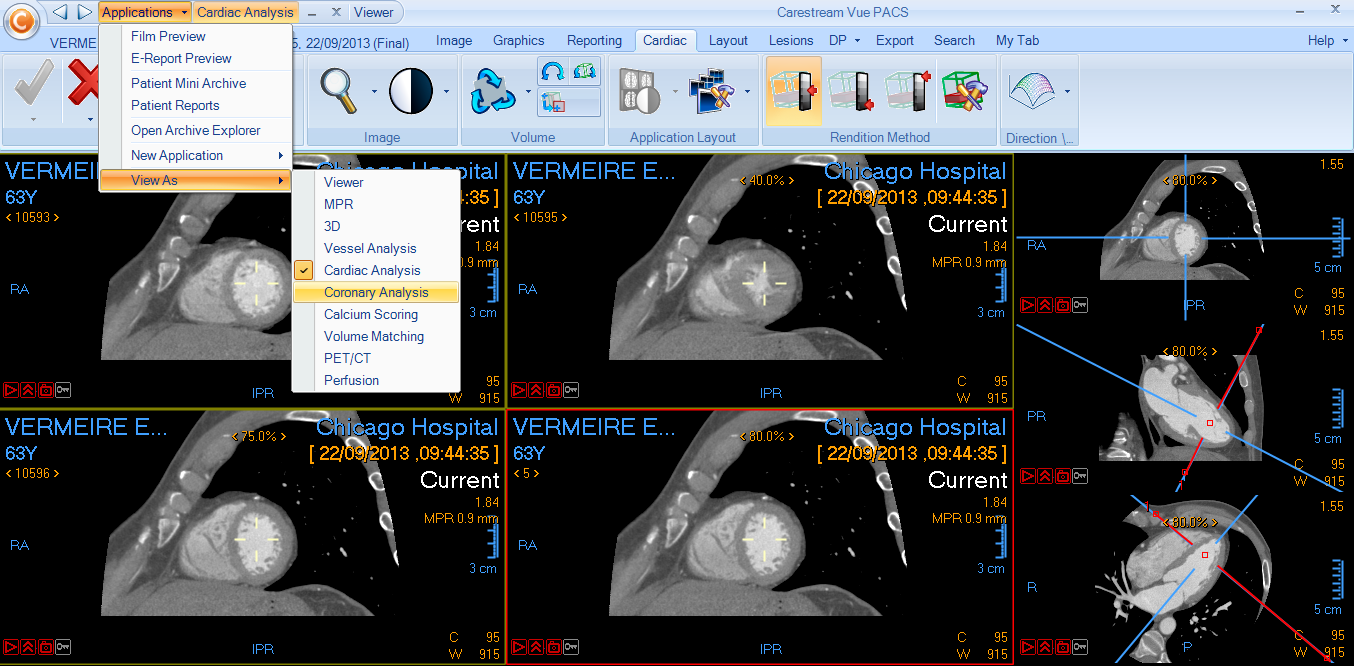
The selected group of images appears in the application. The reference images and result images appear in the location and layout that was last used. |
The Coronary Analysis application can be launched and shows full reading functionality even if only a few phases of a study are selected. You can open the Archive Explorer during a Coronary Analysis session, and add additional phases.
You can retrieve the data from the server and decide which phases to review. If you have a phase that is loaded and not viewed, you can drag that phase into the viewer.
1. Drag a group to drag all the phases.
2. Right-click and drag the group to select which phases should be dragged, then click Add Group.