Creating a PET/CT View

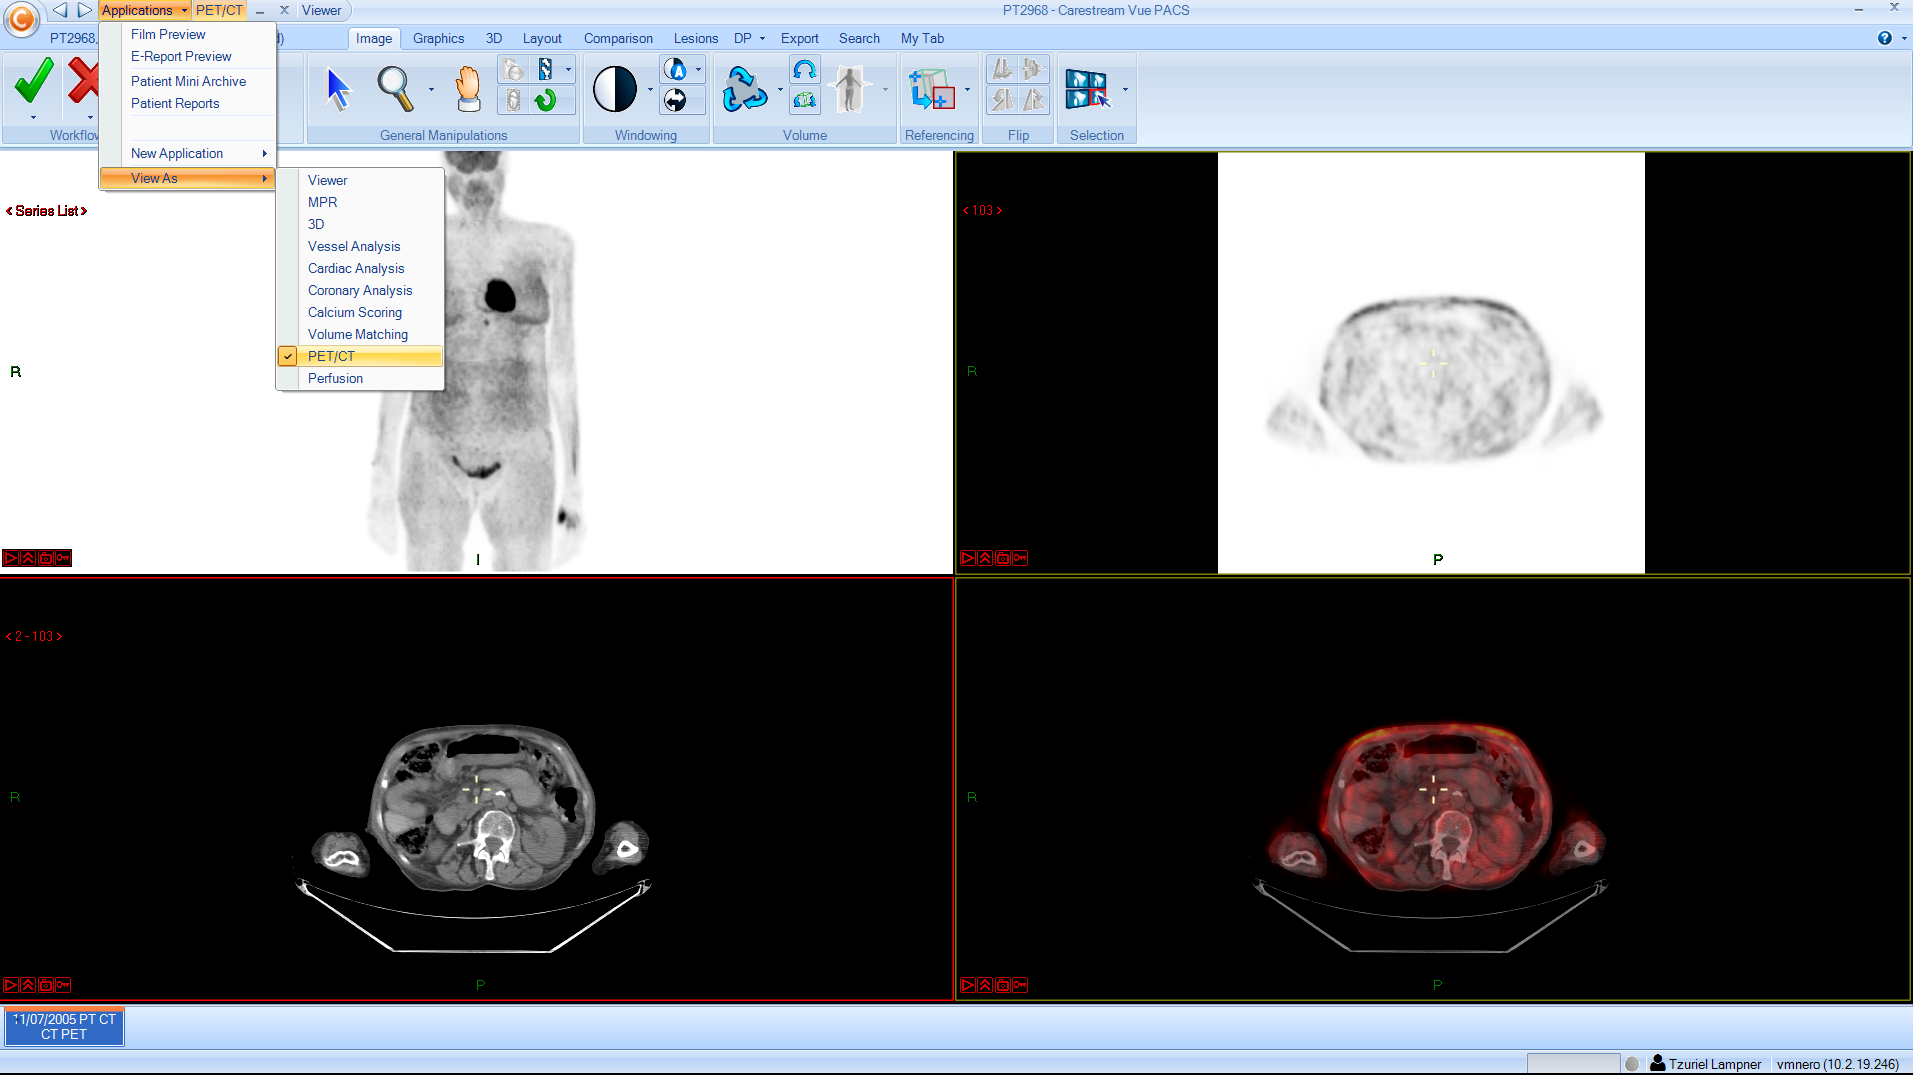
You can create a PET/CT view manually. For information about automatically creating a PET/CT view, view the topics listed under Display Protocols.

To create a
PET/CT View:

Do this:

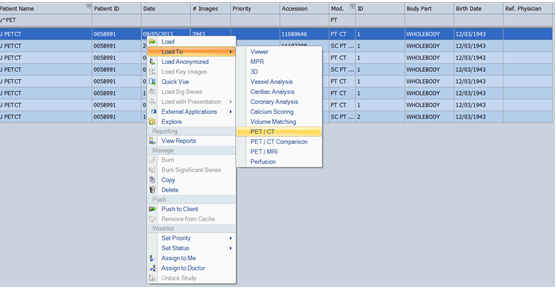
From the Archive Explorer

  • For current studies, right-click each study and select Load To --> PET/CT.

  • For loading current and prior studies, select a study, press the Ctrl key and select the other study, then right-click any of these studies and select Load To  --> PET/CT Comparison.

In the PowerViewer

For current studies:

  • Right-click an existing group, click View As, then select PET/CT.

Or

  • From the Applications menu, select View As, then select PET/CT.

For current and prior studies:

  • Right-click an existing group, click View As, then select PET/CT Comparison.

Or

  • In the Applications menu, select View As, then select PET/CT Comparison.

Or

  • In the Applications menu, select New Application then select PET/CT Comparison.

From the Patient Mini-Archive

1.  Right-click a study group and keep the right mouse button clicked, then drag it to a group display area.

2.  Select PET/CT.

To an open application

  • If the current default application is a PET/CT view, click the study group in the Patient Mini-Archive, then drag it to the display area.

The selected group of images appears in the application. The reference images and result images appear in the location and layout that was last used.